
Tracking speed improvements is crucial for athletes who want to get faster and see real results from their training. Without consistent measurement, you’re basically training blind—you might feel faster, but you won’t know for sure if your hard work is paying off.
Regular speed testing helps you identify what’s working in your training, spot areas that need attention, and stay motivated when progress feels slow. It also prevents you from wasting time on training methods that aren’t helping you improve.
This guide covers the most effective testing methods for measuring speed, how to set up consistent testing conditions, proper recording techniques, and ways to analyze your results over a six-week period. With the right approach to tracking, you’ll have clear data to guide your training decisions and proof of your progress.
Setting Up for Accurate Speed Testing
Choose the Right Speed Tests
The 40-yard dash is the gold standard for measuring straight-line speed, especially for football players. It provides a good mix of acceleration and top-speed measurement that translates well to most sports. For athletes focused on shorter bursts, a 20-meter sprint might be more relevant.
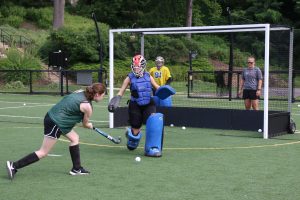
Shuttle runs like the 5-10-5 test measure change-of-direction speed, which is crucial for sports like basketball, soccer, and tennis. Choose tests that match your sport’s movement patterns—a soccer player benefits more from shuttle runs than a track sprinter.
Stick with the same test throughout your six-week period. Don’t switch between different distances or formats, as this makes it impossible to track true progress. Consistency in testing is more important than using the “perfect” test.
Create Consistent Testing Conditions
Find a flat, measured surface that you can use for every test session. A track, football field, or marked gym floor all work well. Avoid testing on different surfaces, as grass, turf, and concrete all affect your times differently.
Test at the same time of day whenever possible. Your body’s energy levels, muscle temperature, and reaction times vary throughout the day. Morning tests will typically be slower than afternoon tests when your body is fully warmed up.
Weather conditions matter for outdoor testing. Wind, temperature, and surface moisture all affect sprint times. Record these conditions in your log so you can account for them when analyzing results.
Standardize Your Pre-Test Routine
Use the same warm-up before every test session. Spend 10-15 minutes on light cardio, dynamic stretching, and practice sprints to prepare your body for maximum effort. A consistent warm-up ensures you’re testing your actual speed improvement, not just how well you prepared that day.
Wear the same type of footwear and clothing for each test. Different shoes can change your times by several tenths of a second. If you must change equipment, note it in your records so you can account for the difference.
Test when you’re rested and recovered, not after hard training sessions. Schedule tests for days when you feel fresh and energized to get your true maximum speed.
How to Test and Record Your Speed
Timing Methods and Techniques
A handheld stopwatch works for basic tracking, but electronic timing systems provide much more accurate results. If using a stopwatch, have the same person time you each session to maintain consistency in reaction time.
For the most accurate hand timing, start the watch when you make your first movement, not when you say “go.” Stop timing when your torso crosses the finish line, not when your foot hits the ground. Practice this technique to minimize timing errors.
Electronic timing systems using laser or photoelectric cells eliminate human error and provide times accurate to the hundredth of a second. Many facilities have these systems available, or you can rent portable versions for serious testing.
Proper Sprint Technique for Testing
Start from the same position every time—whether that’s a standing start, 3-point stance, or blocks. Your starting position significantly affects your time, so consistency is crucial for tracking true improvement.
Focus on proper sprint mechanics during testing: drive with your arms, pump your knees high, stay relaxed in your upper body, and maintain good posture. Poor technique during testing gives you inaccurate baseline times.
Run through the finish line rather than slowing down as you approach it. Many athletes unconsciously ease up in the final yards, which skews their times. Practice running past the timing point in training so it becomes automatic.
Recording and Organizing Your Data
Keep a detailed training log with space for test dates, times, conditions, and notes about how you felt. A simple notebook works, but apps or spreadsheets make it easier to spot trends over time.
Record multiple runs from each test session and use your best time for tracking progress. Take 3-5 attempts with full recovery between runs to ensure you capture your maximum speed that day.
Note any factors that might affect your performance: sleep quality, stress levels, recent training, or minor injuries. This context helps explain unusual results and keeps your data analysis accurate.
Tracking Progress and Analyzing Results
Week-to-Week Comparisons
Look for trends rather than focusing on single test results. Speed improvement isn’t always linear—you might see big gains one week followed by a plateau the next. Compare your current week to 2-3 weeks prior to identify real progress.
Small improvements matter more than you might think. A 0.1-second improvement in a 40-yard dash represents significant speed gains that will be noticeable in competition. Don’t dismiss modest progress as insignificant.
Expect some variation in your times due to factors beyond your control. A range of 0.1-0.2 seconds between test sessions is normal even when you’re not improving. Look for consistent trends rather than demanding perfect progression.
Using Video Analysis
Record your sprint tests from the side to analyze your technique over time. Speed improvements often come from better running mechanics rather than just increased strength or power.
Compare videos from week 1 and week 6 to spot changes in your form. Look for improvements in arm action, knee drive, posture, and stride efficiency. Sometimes you’ll see technique improvements before they show up in your times.
Share videos with coaches or experienced athletes who can spot technique issues you might miss. An outside perspective often identifies problems that are holding back your speed development.
Adjusting Training Based on Data
If your times plateau after 3-4 weeks, it’s time to change your training approach. Your body adapts to consistent training stimuli, so you need new challenges to continue improving.
Analyze which part of your sprint shows the most improvement. If your 10-yard splits are getting faster but your top speed isn’t improving, focus more on maximum velocity training. If you’re slow out of the blocks, emphasize acceleration work.
Don’t abandon training methods too quickly based on one or two test sessions. Give new training approaches at least 2-3 weeks to show results before making major changes to your program.
Conclusion
Measuring your speed over six weeks provides clear evidence of progress and highlights areas for improvement. Consistent testing conditions, careful recording, and thoughtful analysis ensure your training stays effective and goal-oriented. Remember, small gains add up over time, and tracking helps keep you motivated through the ups and downs of any training cycle.
The key is patience and consistency with your testing protocol. Speed development takes time, and the data you collect becomes more valuable the longer you stick with the process. Use your results to guide training decisions rather than just collecting numbers for their own sake.
If you want expert guidance on improving speed and monitoring progress, Athletes Untapped connects you with experienced coaches who tailor training programs to your needs. Personalized feedback and structured plans make it easier to hit your targets and see real results on the clock.